8 Engagement Party Photos Ideas to Capture
Explore 8 engagement party photos ideas, from ring details and portraits to candid moments, guest uploads, QR codes, and organized galleries.
The strongest engagement party photos aren't the ones with the most elaborate styling. They're the ones that combine intentional portraits and details with spontaneous images made by the people who were there in person. That matters because 69% of guests share event photos within 24 hours, and most sharing happens during the first two hours, according to event photography sharing data. A gallery assembled weeks later can still be beautiful, but it misses the period when the celebration is most vivid for guests.
This guide treats engagement party photos as a complete capture system. Each idea includes the purpose of the image, a practical photographer setup, a way to invite guest submissions, and an organizing step for combining professional files with phone photos. You'll find ring details, portraits, group celebrations, candids, décor, food, scenic images, and guest-created content. For ideas that extend beyond the party itself, thoughtful details such as candle gift ideas for meaningful moments can also become part of the visual story.
A simple collection method keeps those perspectives together. EventUploader can provide one upload link or a printable QR code, allowing guests to submit photos from a phone browser without downloading an app or creating an account.
Table of Contents
- 1. The Ring Shot and Detail Close-ups
- 2. Couple Portraits With Props and Themes
- 3. Group and Celebration Shots With All Guests
- 4. Candid Moments and Genuine Emotion
- 5. Table and Décor Styling With an Engagement Theme
- 6. Food and Beverage Moments
- 7. Location-Based and Scenic Background Photos
- 8. Guest Participation and Photo Booth Selfies
- 8-Point Engagement Party Photo Comparison
- Turn Eight Shot Ideas Into One Complete Gallery
1. The Ring Shot and Detail Close-ups
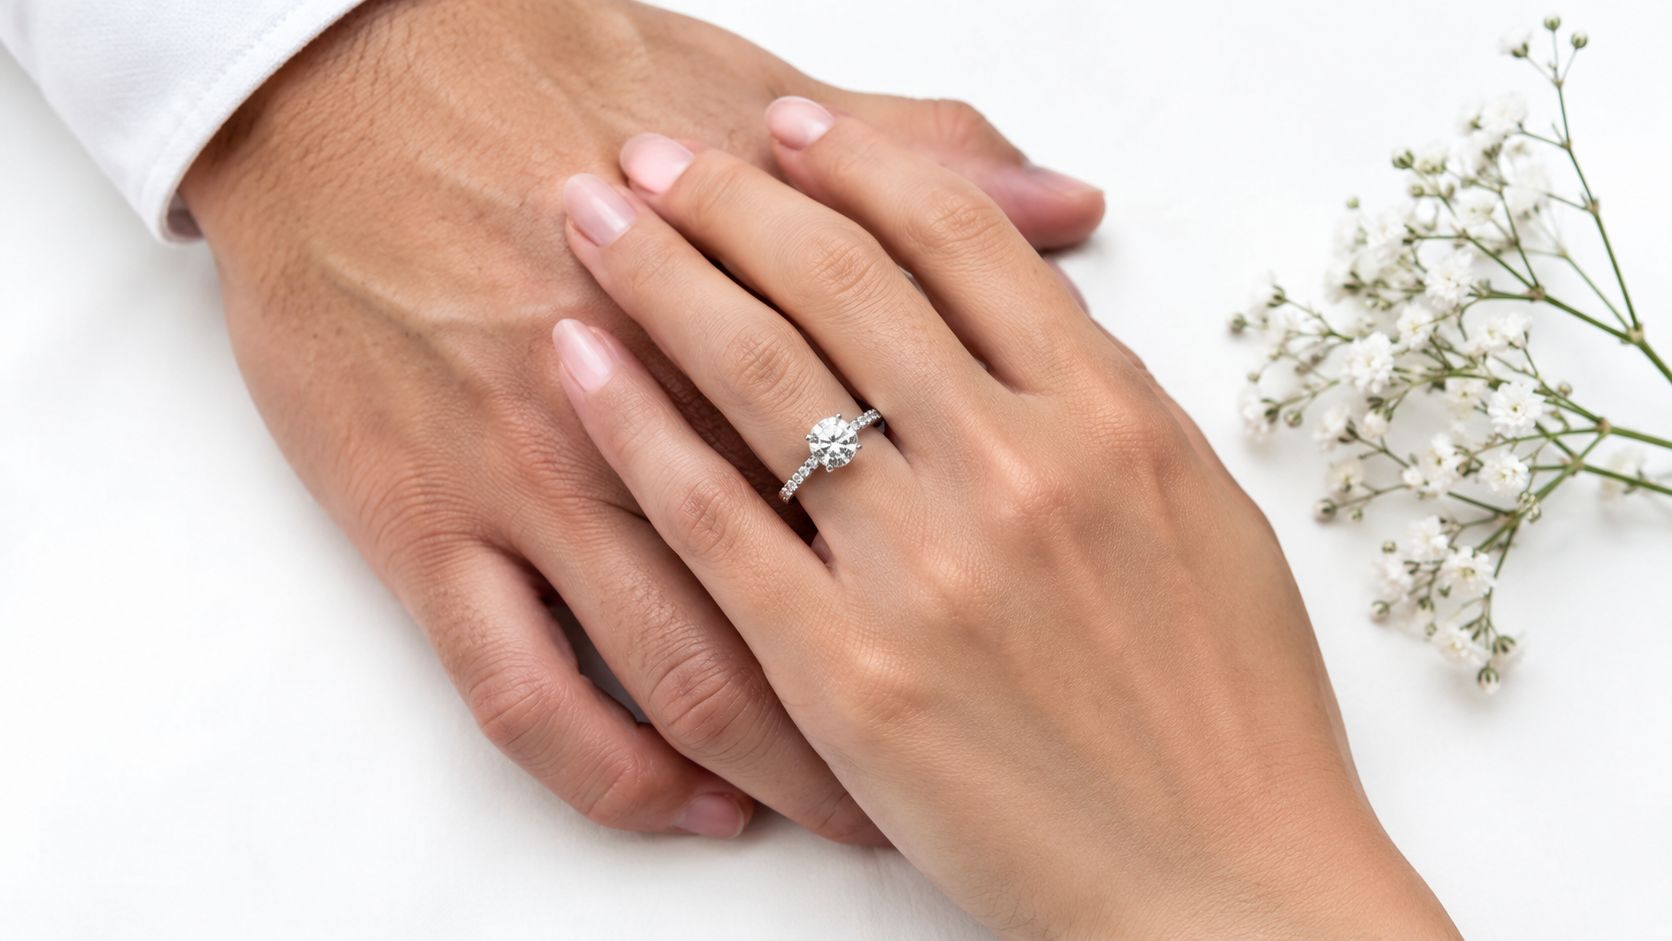
The ring deserves more than a quick phone snapshot between conversations. A carefully made close-up records the stone, setting, band, manicure, and the small details that may be forgotten once the wedding planning begins. Pairing the ring with the couple's joined hands, a handwritten note, flowers, or an element from the venue gives the image context instead of making it feel like a product photograph.
A professional photographer should look for soft, directional light. Window light, open shade, or late-day light can reveal metal and stone without creating harsh reflections. Use a shallow depth of field when the ring should dominate the frame, then make a second image with more of the hands and surroundings in focus. The two photographs serve different purposes, one for visual impact and one for memory.
Give the detail a story
Ask the couple to hold hands naturally rather than positioning every finger. A glass of champagne, the party invitation, a boutonniere, or the venue's distinctive surface can establish where the photograph was made. Avoid placing the ring beside too many competing objects. The eye should understand the subject immediately.
Practical rule: Make one polished detail image, then leave room for guests to contribute their less controlled versions. The professional frame shows craftsmanship, while guest photos preserve how the ring looked in the middle of the celebration.
Place an EventUploader QR code near the welcome table or detail display and invite guests to upload ring photographs, hand shots, and close-ups of meaningful accessories. Keep the instruction short, such as “Add your ring and detail photos here.” The same approach fits naturally into a broader wedding day photo checklist, particularly when you need to account for details before guests move them.
Organize these files in a Details folder. Rename professional files with the couple's names and a short description, then retain guest originals in a separate subfolder until curation is complete. That makes it easier to preserve both the refined hero image and the candid perspective.
2. Couple Portraits With Props and Themes
A couple's portrait should show more than the fact that they're engaged. Use the party's setting, colors, shared interests, or sense of humor to create a visual scene that feels specific to them. A champagne bottle, a custom sign, seasonal flowers, a favorite book, or a meaningful piece of furniture can give the portrait a reason to exist beyond a standard pose.
Set up a portrait area away from the loudest part of the party, but don't isolate the couple completely. A clean background helps, while a little environmental context keeps the image connected to the event. Photograph a composed portrait first, then ask the couple to move, laugh, toast, or read the sign to one another. The transition between poses often produces more natural expressions than another instruction to smile.
Make the setup usable for guests
A prop station can function as both a professional portrait set and a guest activity. Choose props that are easy to hold and unlikely to obscure faces. Personalized signs with names, dates, or an inside joke usually work better than a crowded collection of unrelated accessories.
Create several visual variations rather than forcing every guest into the same frame:
- A polished couple setup: Keep the background uncluttered and use consistent light.
- A playful recreation: Let friends interpret the sign or prop in their own way.
- A seasonal frame: Use the party's flowers, colors, or venue details for continuity.
- A relationship reference: Include an object connected to how the couple met or spends time together.
Place the upload QR code directly at the prop station. Guests can photograph the couple, recreate the pose themselves, or make a group image with the same sign. A private upload page is often more practical than relying on a public hashtag, especially when family members don't use the same social platforms. For wardrobe and styling decisions, a bridal robe styling guide can also provide useful visual direction for getting-ready or portrait details.
Sort the finished images into Couple Portraits, Prop Station, and Guest Recreations. Keep the original files before applying crops or social-media exports, since the same image may later be needed for printing.
3. Group and Celebration Shots With All Guests
Group photography fails when nobody knows when it will happen. Announce a defined group-photo moment, choose a location with enough depth, and ask one person to help gather guests while the photographer handles composition. The couple should stand where they're easy to see, with taller guests placed behind or toward the edges rather than blocking faces.
Start with the most important combinations while attention is available. Photograph the couple with immediate family, then close friends, then the full group. Smaller clusters, such as university friends, siblings, or colleagues, can follow without holding everyone in place for too long.
Build a reliable group sequence
The main group photograph deserves a professional camera or a trusted guest who understands focus, exposure, and timing. Take several frames without making the process feel like a formal ceremony. Check faces before dismissing people, especially when the group includes children or older relatives who may need more time to settle.
A useful sequence is:
- Immediate family: Keep the group close and prioritize clear faces.
- Friends by connection: Photograph people who naturally know how to interact.
- The full gathering: Use the widest practical composition and a stable vantage point.
- Small spontaneous groups: Capture hugs, linked arms, and conversations after the formal frames.
The professional sequence gives the hosts a dependable record. Guest submissions add angles the hired photographer can't cover, such as a friend photographing the group from the side or a relative capturing the moment just before everyone lines up. Put the EventUploader link on the invitation reminder and display the QR code at the venue so guests know where group photographs belong.
Create folders for Family, Friends, Full Group, and Unplanned Group Moments. If multiple guests upload similar images, keep the sharpest frame and retain the rest in an archive until the couple has reviewed them.
4. Candid Moments and Genuine Emotion
A candid gallery needs coverage, not just luck. Assign a photographer to move through the room discreetly, using a longer lens when appropriate and watching for transitions. The best moments often occur immediately before or after a planned event, when guests stop performing for the camera and return to the conversation.
Focus on relationships rather than random activity. A parent reacting to a toast, friends laughing over an old story, the couple listening to a speech, or two relatives meeting for the first time gives the gallery emotional structure. Photograph hands, expressions, body language, and the surrounding people so the image explains what was happening.
Let the room create the picture
Don't interrupt every emotional moment to arrange it. Watch the light, anticipate where people will move, and avoid placing yourself between guests and the person speaking. If the room is dim, raise your ISO or use bounced flash carefully rather than flooding faces with direct light.
Guests can fill important gaps. Ask them to upload reactions, conversations, hugs, and dance-floor moments during the party. A short reminder by text later in the evening can prompt people who captured something but haven't submitted it. If the hosts want a live display, moderate images before showing them, since not every phone photograph is ready for public viewing.
Keep candid files organized by arrival, announcement, toasts, conversation, and farewell rather than by photographer. That structure helps the final gallery feel like a story. Use private sharing when the images include vulnerable reactions or guests who don't want their faces posted publicly.
5. Table and Décor Styling With an Engagement Theme
Photograph the room before guests arrive. Once people sit down, move place cards, open favors, pick up menus, and shift centerpieces. A clean pre-event record preserves the planning work and gives you the freedom to photograph the celebration later without worrying that every detail still looks untouched.
Begin with a wide image that shows how the décor works as a whole. Then move closer to the elements that communicate the couple's style, such as custom stationery, floral textures, candles, table numbers, menus, signage, or a personal memento. Keep vertical lines straight when photographing tables and rooms. A slightly higher viewpoint can show place settings clearly, while a lower angle can make candles and flowers feel more dimensional.
Photograph the details in layers
Use natural window light when it gives the materials accurate color. If the room is dark, position a small light source to one side and avoid mixing strongly colored ambient light with a flash. Capture both a horizontal composition for the gallery and vertical details suitable for mobile sharing.
Invite guests to submit the décor as they experience it. Someone may notice a handwritten message, a family photograph, or a small table detail the professional photographer missed while covering the couple. Place a discreet QR sign near the bar or table entrance, not directly on top of the centerpiece.
For printable signage that can carry the upload instruction without disrupting the design, use printable wedding signs. Label the collected material Room Wide, Tablescapes, Stationery, Florals, and Personal Details. Preserve the pre-event images separately from guest photographs, because the clean setup and lived-in version serve different purposes.
6. Food and Beverage Moments
Food photographs work best when they show anticipation, action, and reaction. Photograph the cake or dessert display before anyone cuts it, then plan for the hands, knife, first slice, and the couple's response. Do the same with drinks. A row of champagne glasses before the toast tells a different story from the raised glasses and the first sip afterward.
Coordinate the timing with whoever is leading the party. The photographer should know when the toast, cake cutting, or announcement will happen and where the main light is coming from. For a cake cutting, one photographer can take a clean front-facing frame while another position captures the couple looking at each other or guests reacting behind them.
Cover the moment from more than one perspective
Guests should photograph key moments from their seats rather than crowding the couple. A guest image from the back of the room can show the scale of the celebration, while the professional photographer handles close expressions and hands. Ask guests to upload those images through the shared link soon after the moment ends, while they can still identify the sequence.
Useful coverage includes:
- Before the toast: Glasses, bottles, florals, and the room prepared for the announcement.
- During the toast: The speaker, the couple's reaction, and guests raising their glasses.
- At the cake: The design, the cutting action, the first serving, and laughter around the table.
- After the celebration: Empty glasses, shared plates, and small signs that the party was enjoyed.
Create folders for Cake, Toast, Champagne, Food Display, and Guest Reactions. Don't overproduce nearly identical images of the cutting. Select frames that add a new angle, expression, or piece of context.
7. Location-Based and Scenic Background Photos
The venue should support the story, not overpower the people in it. A garden, beach, vineyard, city view, historic interior, or decorated home can establish where the engagement party happened. The most effective scenic engagement party photos balance a recognizable environment with a couple who remains visually important.
Scout the location before the event. Check where the sun falls, whether guests will block the background, which paths are safe, and whether the couple can step away without missing the celebration. If the venue has several strong areas, choose one for a wide environmental portrait and another for a closer image with less visual distraction.
Use the location as a frame
Look for natural lines such as pathways, railings, windows, tree branches, or architectural edges. Place the couple where those lines lead toward them. A wide photograph can communicate atmosphere, but don't make every image wide. Follow it with a medium portrait and a close interaction so the set has scale and intimacy.
Golden-hour timing can create warm light, but it shouldn't control the entire schedule. Guests may be eating, speeches may be underway, and the couple may not want to leave the party for a long session. Reserve a short window, communicate it in advance, and return the couple to their guests promptly.
Ask guests to photograph their favorite venue details, from a view outside to a distinctive doorway or lounge area. A QR code near the exit can collect those images without interrupting the event. Organize the results as Venue Wide, Couple in Location, Guest Favorites, and Indoor Atmosphere. That makes the final gallery useful for both memory keeping and future planning inspiration.
8. Guest Participation and Photo Booth Selfies
A photo booth works when guests understand what to do within seconds. Give it a clear backdrop, flattering light, enough space for groups, and props that relate to the couple. Avoid making the station so elaborate that guests need an attendant to operate it. A simple frame, a sign, and a well-placed phone can produce more usable images than complicated equipment that creates a queue.
The booth should create a different kind of image from the professional portraits. Encourage exaggerated expressions, friend groups, family combinations, and recreations of the couple's favorite jokes. Those imperfect frames often become the most personal part of the collection because guests made them for one another.
Remove friction from the upload path
Place a printable QR code beside the booth and include a short instruction such as “Scan, upload, and keep posing.” Browser-based, QR-driven sharing can invite more participation than an app-based process. One 2026 wedding photo-sharing case writeup reports 72% average guest participation for QR-code sharing, compared with 15% to 25% for traditional app-based methods, and says the no-app flow takes about 30 seconds per guest. These figures come from a guest photo-sharing case story, so treat them as a benchmark rather than a guarantee for every party.
Give guests the option to upload without making their images public. A private, invite-only gallery suits a personal engagement celebration and avoids forcing older relatives or privacy-conscious friends onto social media. Recent event photo-sharing coverage also describes private galleries, QR codes, and app-free delivery as part of a broader move toward controlled sharing.
Use photo challenge cards to prompt specific contributions, such as “Photograph someone laughing,” “Find the best table detail,” or “Capture a toast reaction.” Sort uploads into Booth, Selfies, Challenges, and Family Creations. Keep the original files before creating a polished social set.
8-Point Engagement Party Photo Comparison
| Style / Shot | Implementation Complexity (🔄) | Resource Requirements (⚡) | Expected Outcomes (⭐ 📊) | Ideal Use Cases (💡) | Key Advantages |
|---|---|---|---|---|---|
| The Ring Shot & Detail Close-ups | 🔄🔄, precise composition, macro technique | ⚡⚡, macro lens/lighting, minimal props | ⭐⭐⭐, high shareability, timeless 📊 | Save‑the‑dates, social posts, jewelry highlight | 💡 Highlights detail; classic, highly shareable |
| Couple's Portrait Session with Props & Themes | 🔄🔄🔄, styling, posing, coordination | ⚡⚡⚡, props, outfits, locations, pro shooter | ⭐⭐⭐, personalized storytelling 📊 | Announcements, portfolio, themed content | 💡 Highly customizable; strong narrative images |
| Group & Celebration Shots with All Guests | 🔄🔄, coordination and staging effort | ⚡⚡, organizer + multiple shooters | ⭐⭐, documents community, emotional impact 📊 | Family keepsakes, guest inclusion galleries | 💡 Captures support system; guests feel included |
| Candid Moments & Genuine Emotion Capture | 🔄🔄, unpredictable, requires coverage | ⚡⚡, roaming shooters or many guest phones | ⭐⭐⭐⭐, most emotionally resonant 📊 | Storytelling, highlight reels, authentic galleries | 💡 Feels real and memorable; high emotional value |
| Table & Décor Styling with Engagement Theme | 🔄🔄, styled setups, flat‑lays, lighting | ⚡⚡, styling materials, good lighting | ⭐⭐, aesthetic, planner‑friendly 📊 | Event design showcases, inspiration boards | 💡 Showcases creative effort; great for portfolios |
| Food & Beverage Moments (Cake/Toasts) | 🔄🔄, timing and angle challenges | ⚡⚡, photographer positioning, prep | ⭐⭐, festive, universally appealing 📊 | Cake cutting, toasts, social highlights | 💡 Captures rituals and celebratory energy |
| Location‑Based & Scenic Background Photos | 🔄🔄🔄, scouting, timing (golden hour) | ⚡⚡⚡, travel, permits, timing constraints | ⭐⭐⭐⭐, visually striking, high shareability 📊 | Destination shoots, announcement imagery | 💡 Location adds storytelling and uniqueness |
| Guest Participation & Photo Booth / Selfie Moments | 🔄🔄, setup and guest flow management | ⚡⚡, booth/props, QR codes, space | ⭐⭐, high volume UGC, broad reach 📊 | Guest engagement, social campaigns, casual fun | 💡 Drives submissions; fun, interactive content |
Turn Eight Shot Ideas Into One Complete Gallery
A strong gallery needs coverage assignments before the first guest arrives. Decide who will photograph the ring and décor before the room fills, who will direct the couple's portrait session, who will organize family and friends, and who will move through the party for candid moments. If one professional photographer is covering everything, protect the planned moments in the timeline and use guests to expand the viewpoint rather than expecting one person to be everywhere.
The collection plan should be just as specific as the camera plan. Prepare one upload link and one printable QR code, then place them at the welcome table, prop station, bar, dessert table, and photo booth. Tell guests what belongs in the gallery, including phone photos, short videos, reactions, venue details, and group images. They shouldn't need to guess whether the page is only for professional photographs.
A simple operations funnel helps reveal where the process breaks. Track invited guests, unique contributors, uploads, time to first upload, late uploads, and successful exports. A practical event photo-sharing guide also recommends comparing QR placement, announcement frequency, and venue network quality. If uploads are slow, check the Wi-Fi before blaming the guests. If hardly anyone contributes, improve the sign, move the QR code, or ask the host to make a short announcement.
Use a file structure that supports the final gallery
Sort files into useful groups instead of leaving everything in one chronological folder:
- Details: Ring, jewelry, stationery, flowers, and personal objects.
- Couple: Styled portraits, environmental portraits, and informal interactions.
- Guests: Family, friends, full-group images, and individual relationships.
- Celebration: Toasts, cake, champagne, dancing, and reactions.
- Décor and venue: Room views, tablescapes, signage, and scenic backgrounds.
- Guest submissions: Phone photographs and videos retained in original quality.
Keep professional and guest files identifiable during the first review. A filename such as 2026-06-14_couple_toast_01 is more useful than a camera-generated sequence, while guest files can retain their original names inside a clearly labeled submission folder. Remove duplicates only after checking whether a slightly different frame captures a better expression or a missing person.
Privacy needs a place in the workflow. Ask the hosts whether the gallery should be private, whether guests can view submissions immediately, and whether any images need approval before sharing. A private gallery can be the right choice for family reactions, children, or guests who don't want their photographs posted publicly. The goal isn't to maximize public exposure. It's to preserve the celebration in a way the people in it are comfortable revisiting.
The eight ideas work together because each one fills a different gap. Professional details provide polish, portraits establish the couple's identity, group images document relationships, candids preserve emotion, and guest submissions add angles no hired photographer can predict. Décor and scenic frames explain the setting, while food, toasts, and booth images give the gallery a beginning, middle, and end.
That combination also makes the final collection more useful for future sharing. A photographer can select refined images for the couple's announcement, while the hosts can keep the broader private gallery for family and friends. Practical resources such as Instagram growth guidance for photographers may help with public presentation, but public posting should remain an intentional choice rather than the default destination for every file.
The essential checklist is straightforward. Assign coverage for details, portraits, groups, action moments, and candids. Prepare guest instructions, place the link or QR code where people naturally pause, monitor the upload flow, and sort the results into portraits, guests, décor, food, venue, and original submissions.
A memorable engagement party gallery depends on both sides of the system. The photographer creates intentional images with strong light, composition, and timing. Guests supply the spontaneous perspectives, and an easy collection method gathers those files before they disappear into individual phones or group chats.
EventUploader gives engagement parties a branded upload page, one shareable link, and a printable QR code so guests can submit photos and videos without an app or account. Set up your private gallery, place the QR code beside the photo booth or welcome table, and invite everyone to contribute through EventUploader.