How to Upload Pictures to a Website: Event Photo Guide
Learn how to upload pictures to a website from phones or desktops, with image prep, privacy tips and fixes for event photo collections.
The QR code is on the tables, guests are taking pictures, and someone's already asking why their iPhone photo won't upload. Another guest's file arrives sideways. Meanwhile, the pictures that do upload may still contain location details you never intended to share.
Knowing how to upload pictures to a website means more than finding the upload button. For an event, you need a route guests can use, files the website can process, and a deliberate decision about what becomes downloadable. Start with the upload method, then test the awkward files before guests arrive.
Table of Contents
- Pick the Upload Method That Fits Your Site
- Prepare Pictures So They Upload Cleanly
- Upload Your Pictures Step by Step
- Fix Uploads That Fail on Phones and Desktops
- Remove Location Data Before Guests Upload
- Share the Link and Check the Gallery Before the Event
Pick the Upload Method That Fits Your Site
| Method | Best for | Who uploads | Typical limit |
|---|---|---|---|
| CMS media library | Blog posts and product pages | Site owner | Hosting upload size setting |
| Drag-and-drop gallery plugin | Portfolios and photo galleries | Site owner | Plugin and server limits |
| Hosted upload page with QR code | Event photos from guests | Guests on phones | Per-file limit set by organizer |
| FTP or SFTP | Bulk folders of files | Developer or admin | Server storage, permissions, and transfer quotas |
| API upload | Automated, high-volume image feeds | Developer | Set by the API provider |
Choose according to who's sending the pictures, not just where you want to display them. A CMS media library makes sense when you control the website and its content. It's a poor invitation for wedding guests because it puts them inside an administrative workflow they don't need.
A gallery plugin suits an owner-managed portfolio. If presentation is your main concern, use this guide to creating a photo gallery for a website to separate gallery layout decisions from file collection.
Browser uploads versus administrative transfers
Browser-based uploading rests on a long-established mechanism: the Internet Engineering Task Force's RFC 1867, published in November 1995, introduced the HTML file-input control and multipart/form-data. The browser selects local files and sends their contents to a server, without requiring a native upload application.
CMS forms, gallery uploaders, and hosted event pages can use that browser workflow. FTP and SFTP are different transfer methods, while an API follows its provider's implementation. They're useful for moving existing folders or connecting systems, not for asking guests to contribute from a table.
For event collection, we use a different process at EventUploader: attendees send photos and videos through the organizer's unique link or QR code. The guest upload page works in any mobile browser on any phone, without an app or guest account.
Decision rule: Give website editors a media library, give guests an upload page, and give automated systems an API.
Match your situation to a table row before configuring anything. Otherwise, you can spend time perfecting a gallery that guests still have no practical way to contribute to.
Prepare Pictures So They Upload Cleanly
A phone original can look fine on screen and still cause trouble: HEIC files may be missing from a guest's file picker, while downloadable originals can retain GPS data. Prepare display copies for the website, and decide separately whether guests should be able to upload their original files.
| Setting | Recommended value | Why it matters |
|---|---|---|
| Long edge for gallery display | Match the largest intended display size | Fits phone and laptop screens without wasted bytes |
| JPEG quality for web copies | Export at reduced quality, then inspect fine detail | Keeps visible detail while reducing file size |
| Display file size | Small enough for a satisfactory phone-network test | Avoids unnecessarily slow gallery browsing |
| Original file | Keep unchanged in a private archive | Preserves full quality for export and archive |
Prepare a display copy, not a replacement for your original. In Preview, Photos, or another editor, duplicate the photograph and work on the copy. Crop to the intended aspect ratio before exporting; repeated edits and compression can soften detail.
Resize and export, then inspect the result before uploading.
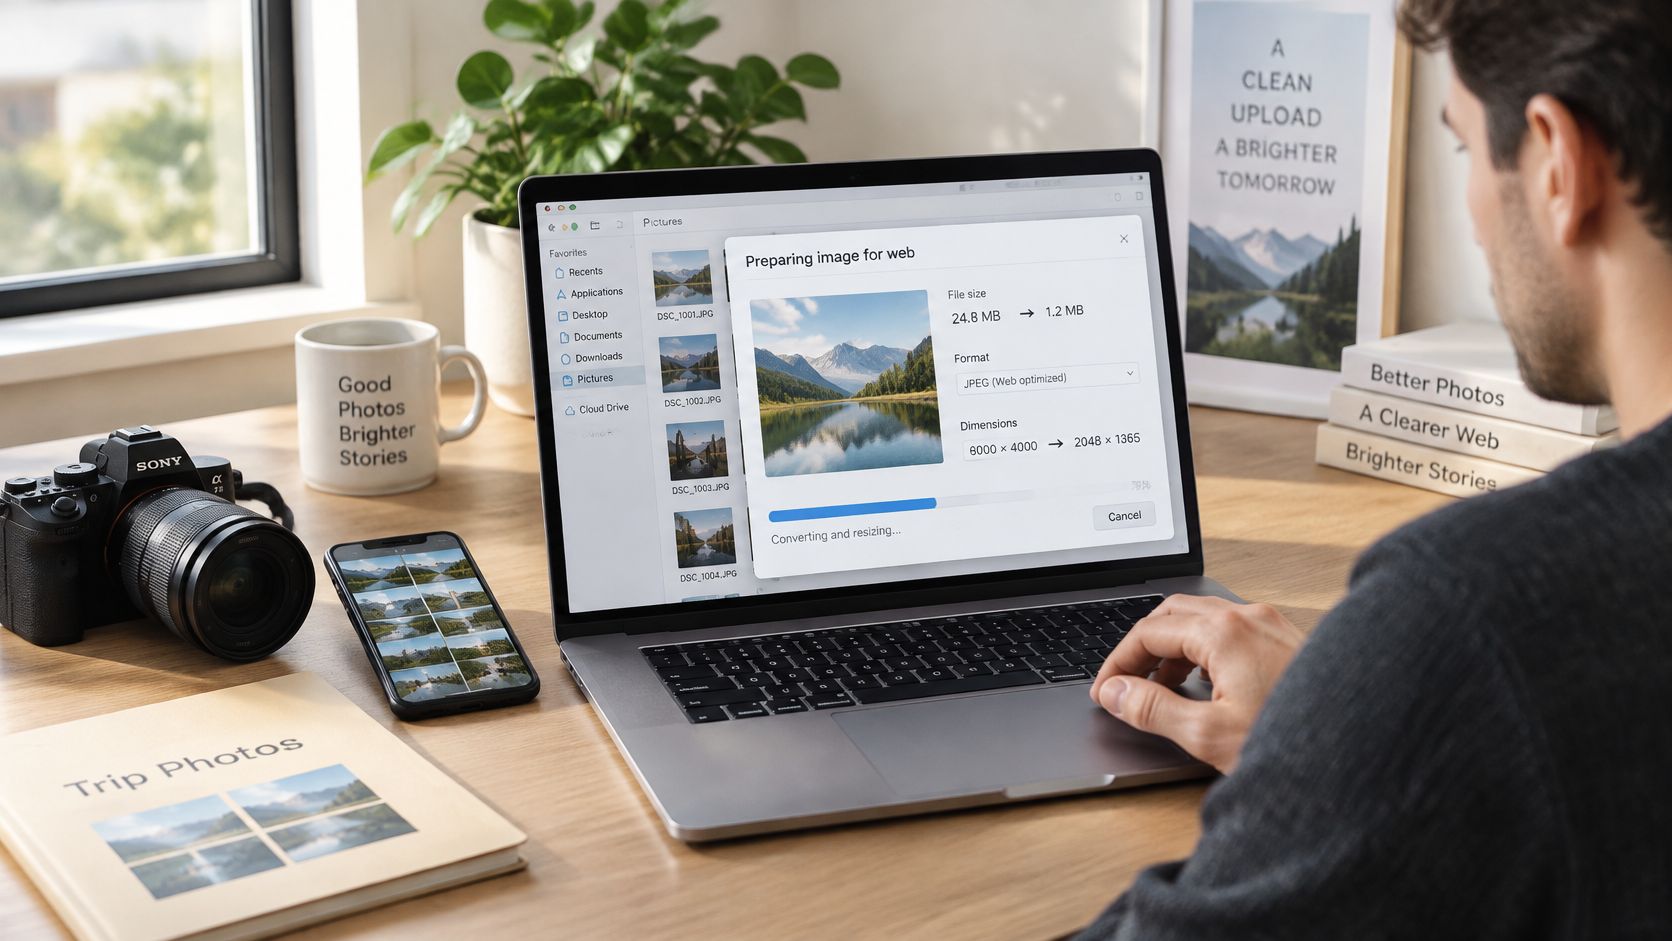
Choose formats by purpose
JPEG is a practical interchange format for camera photographs. PNG suits screenshots and graphics that need transparency. WebP works for website display copies when the publishing workflow supports it.
The 2024 Web Almanac found that JPEG represented 32.4% of web images and PNG 28.4%. Those figures describe images used on websites, not the formats guests will bring.
To compress images without sacrificing quality, inspect faces, hair, foliage, and lettering after export. A smaller file is not an improvement if compression leaves visible blotches or jagged edges.
- Photographic detail: Reduce compression if faces develop blotchy edges.
- Transparency: Keep a graphic in PNG if its transparent background matters. JPEG does not preserve it.
- Phone originals: Keep HEIC files in your archive. If a file picker or publishing workflow does not accept HEIC, export a JPEG copy from the Photos app or use a trusted HEIC-to-JPG converter.
For guest collections, avoid making every attendee convert files before uploading. Accept supported originals where possible, and create smaller browsing copies for display. Keep in mind that downloadable originals may still contain GPS data, so check location metadata before sharing them.
Upload Your Pictures Step by Step
Use a CMS media library as the example below. A hosted event page removes the administrative editing work for guests, but selecting files, waiting for completion, and checking the result still matter.
Keep this sequence handy while you make a test upload.
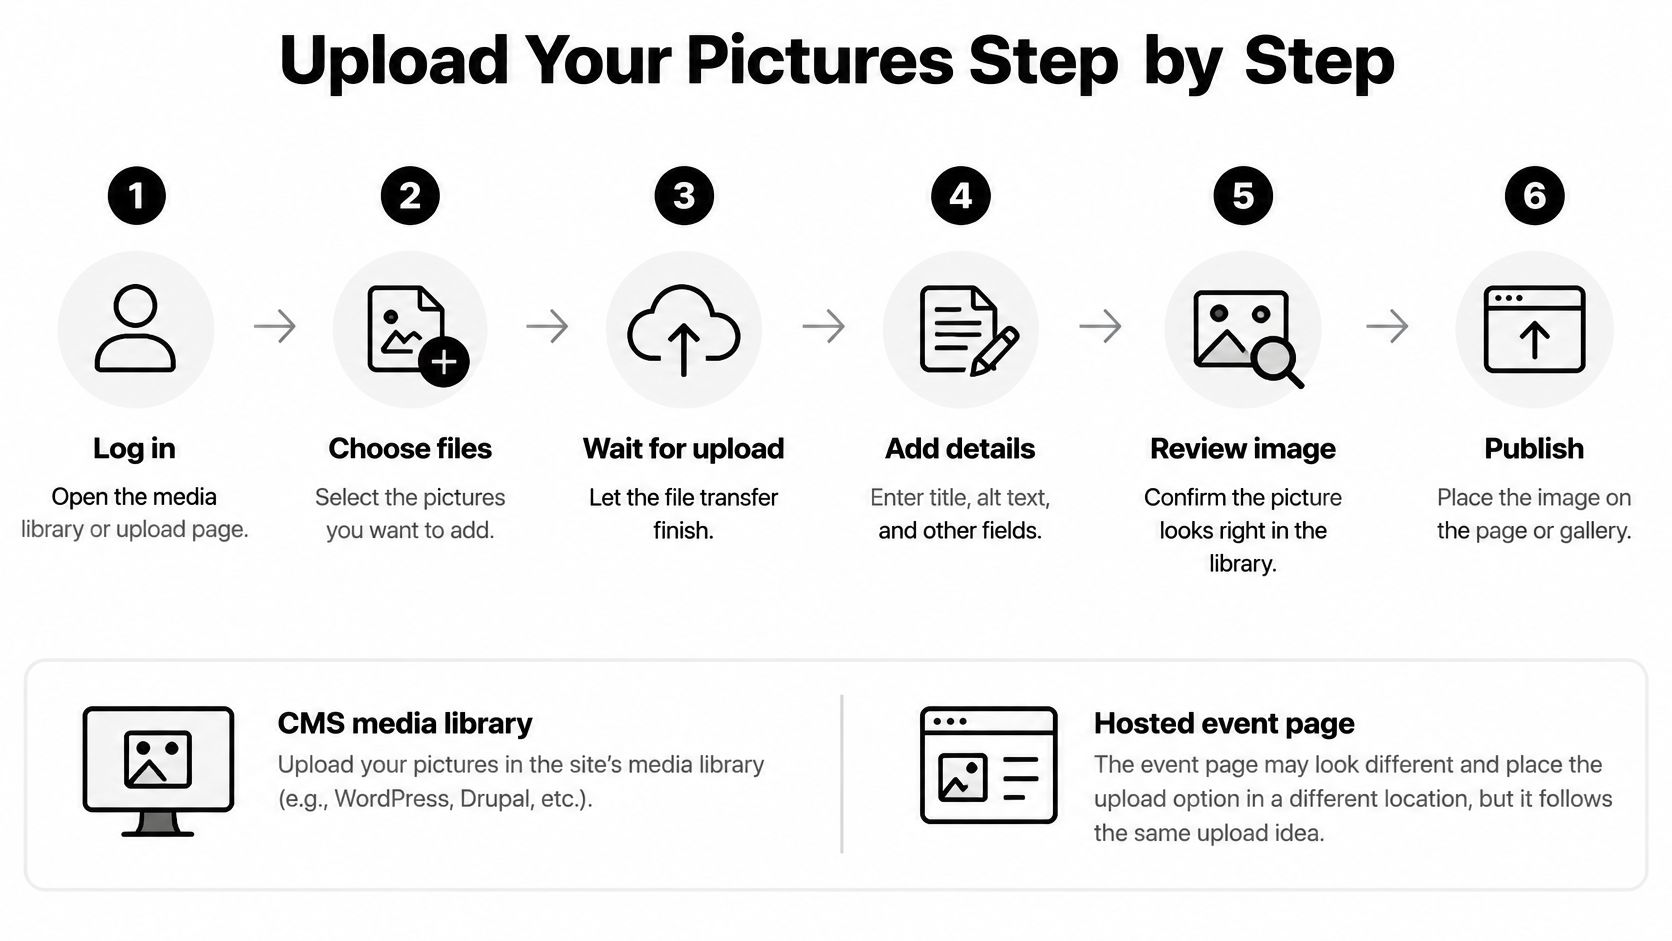
Open the right upload area. Sign in to your CMS and open its media library or file manager; some editors also offer an upload control inside an image block. On a hosted event page, guests open the organizer's invitation instead of entering the website administration area.
Choose your pictures. Click the file-selection button or drag files into the marked upload area, using Ctrl or Cmd for multiple selections on a desktop. Start with a small batch on a phone so a weak connection doesn't leave you sorting through a large set of unfinished transfers.
Wait for confirmed completion. Keep the tab open while each file transfers, then check whether the website says complete or still processing. A finished transfer bar doesn't necessarily mean the server has validated and stored the picture.
Add useful image details. Write descriptive alt text for meaningful images, use a recognizable library title, and add a caption when readers need context. Don't repeat the filename everywhere or assume a title replaces alt text; decorative images generally need an empty alt attribute rather than a redundant description.
Insert and inspect. Place the picture in its image block or gallery, then preview it at desktop and phone widths. Check the crop, orientation, and sharpness, especially where a gallery forces differently shaped photographs into uniform tiles.
Publish and verify. Publish or update the page, reload its live address, and confirm the picture appears without a broken-image icon. For an event collection page, check the organizer's dashboard instead, since receiving a contribution doesn't necessarily publish it.
Check the stored result, not just the animation
The OWASP File Upload Cheat Sheet recommends server-side checks including file-type validation, size restrictions, generated filenames, and safe storage. Browser checks improve feedback, but they aren't a substitute for verifying the actual file on the server.
For an organizer, the practical test is straightforward: open the uploaded item, inspect its dimensions and orientation, and download it if retaining originals matters. A thumbnail alone doesn't prove the downloadable file is correct.
For a visual walkthrough of website uploading, use the accompanying video.
Say you're collecting wedding pictures. We organize the collection process around creating and customizing the event, sharing its invitation, then managing and downloading contributions. Guests handle file selection while you check arrivals, rather than asking everyone to build or edit a web page.
Success means the stored file opens correctly and its intended destination displays it cleanly. Don't treat a disappearing progress indicator as proof.
Fix Uploads That Fail on Phones and Desktops
An iPhone picture that's visible in Photos but absent from a website's picker is a format-compatibility clue, not proof that the photograph has disappeared. Start with the symptom rather than repeatedly pressing Upload.
| Symptom | Likely cause | Fix |
|---|---|---|
| iPhone photo missing from the picker | HEIC compatibility or the picker's format filter | Export the existing picture as JPEG; use Settings → Camera → Formats → Most Compatible for future captures |
| Preview never appears | Unsupported or corrupted file | Re-export the picture as JPEG and upload again |
| Upload stalls on mobile | Too many simultaneous transfers or an unstable connection | Send a smaller batch and wait for completion |
| File rejected as too large | Over the per-file limit | Resize a copy to the intended display dimensions and reduce export quality |
| Photo arrives sideways or blank | Orientation handling or decoding failure | Apply rotation in an editor, save a fresh copy, and retry |
Fix the existing file first
Changing the camera to Most Compatible affects future captures. It doesn't retroactively convert the pictures guests have already taken, so an existing missing image needs a fresh JPEG export or a website that can handle its original format.
A developer's HEIC compatibility walkthrough describes uneven browser decoding and gives an illustrative comparison: a 12-megapixel HEIC may occupy 2–4 MB, while a JPEG version may occupy 4–8 MB. Conversion can solve compatibility while making the next upload slower, so inspect the exported file's size before retrying.
Don't merely rename .heic to .jpg. That changes the label, not the encoding, and a properly validating website can still reject it.
A JPEG export is a compatibility fix. It isn't automatically a file-size fix.
Separate file failures from website limits
If a small, ordinary JPEG also fails, check the connection and website configuration before converting everyone's library. On a self-hosted PHP website, the application's limit may conflict with the server's upload or request-size settings; UpTime Web Hosting's PHP upload guide is useful for locating those controls.
A connection switch or smaller batch can be tried immediately. Corrupt files, incompatible encoding, and baked-in orientation problems require a new export.
When several guests report the same problem, test a known-good JPEG through the exact same page first. If it works, investigate the affected file format; if it fails, investigate the shared upload path rather than asking every guest to edit their photos.
Remove Location Data Before Guests Upload
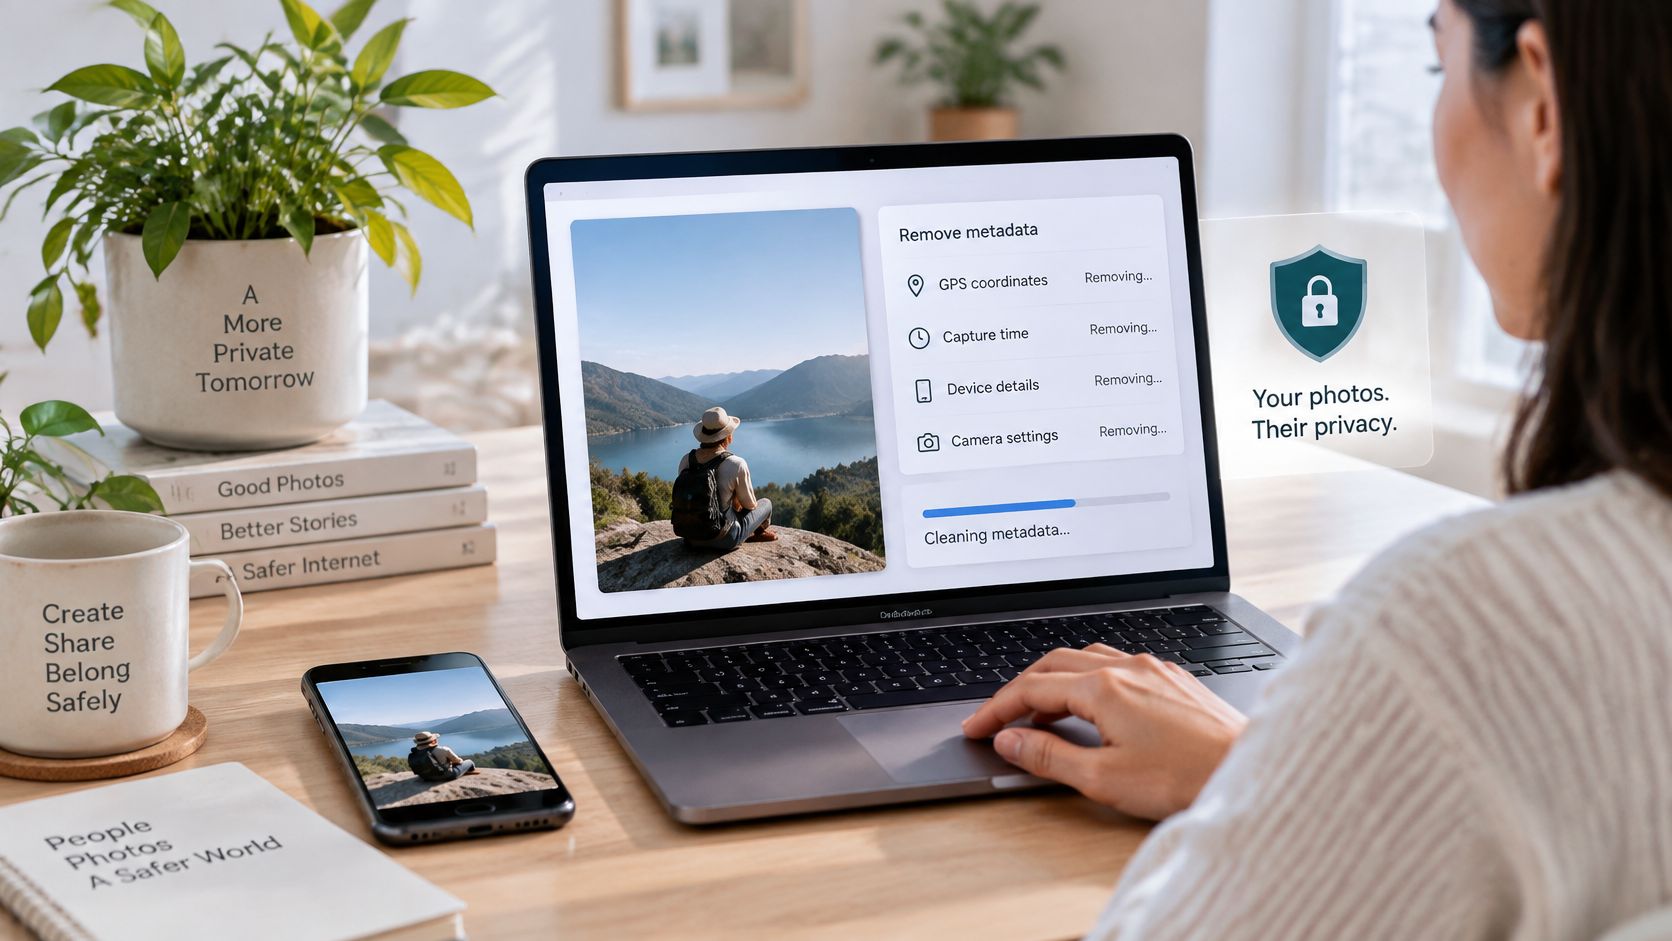
A private gallery isn't automatically a private image file. An original smartphone photograph can contain EXIF metadata such as GPS coordinates, capture time, device details, and camera settings. A harmless-looking image may therefore disclose more through its download than through its visible content.
The photo metadata privacy guide explains the risks and describes University of Michigan guidance to check metadata, disable unnecessary camera geolocation, and remove sensitive metadata before sharing. Access restrictions answer who can retrieve a file, not what that person can learn from it.
Separate the archive from the shareable copy
- Disable future location tagging. Before the event, turn off camera location access if you don't need it. This won't remove coordinates already embedded in existing pictures.
- Sanitize files for sharing. Use an editor or metadata-removal tool to remove GPS information, then reopen the exported file's properties to check the result.
- Protect untouched originals. Keep archival copies separately, with access limited to the people who need them.
- Choose the audience deliberately. Decide who should receive access before circulating the gallery invitation.
Inspect the exported copy rather than assuming a save operation removed everything.
If you're comparing image-protection tools, Imageguard from Premier Broadband is another option to evaluate. Check the tool's stated handling of metadata and test an exported file rather than assuming image protection includes GPS removal.
Our access rule is explicit: uploads remain visible only in your organizer dashboard unless you publish an album. Publishing turns the upload page into a shared gallery visible to everyone who has the link, so treat that invitation as something recipients can forward.
For weddings, children's parties, home celebrations, and surprise parties, remove location information from shareable copies by default. Before publishing, ask: Would this picture, or its embedded metadata, reveal where someone lives?
Share the Link and Check the Gallery Before the Event
A working desktop upload isn't enough to approve an event collection page. Test the actual guest journey on an iPhone, an Android phone, and a desktop browser, using a HEIC photograph, a JPEG, and a short video. Confirm the files arrive, open correctly, and can be downloaded when needed.
Don't promise guests a particular completion time. Their connection and file size affect the transfer, and a successful test should establish what completion looks like rather than create a speed guarantee.
Test the printed invitation
- Scan from the seat. Place a printed card where guests will use it and check that the code is readable without awkward stretching.
- Give a clear instruction. Ask guests to contribute candid photos and short clips, rather than leaving the purpose of the code unexplained.
- Keep the invitation consistent. Use the same destination in table cards and reminder messages so guests don't have to choose between competing collection locations.
- Set a closing decision. Decide when you'll stop accepting contributions and leave yourself time to review the results.
For a wedding, put a card on each table and send a reminder after the celebration, while guests still have their pictures handy. This guide to how to share photos can help you choose how to distribute the finished selection without turning a group chat into the archive.
Budget for the test before the collection
Our free plan costs €0 and includes 500 MB of storage, basic support, QR code generation, and a branded upload page. Use the trial event to inspect the complete journey, including what guests see after selecting a file and what you receive as organizer.
Choose the shareable selection deliberately rather than publishing everything that arrives. You can publish selected photos and videos on the existing invitation page and unpublish the album whenever you need to withdraw access.
Before you distribute the invitation, upload a picture yourself from a phone.
That small rehearsal checks the part guests will use. Do it with the printed code, not just an administrative preview.
Collect guest photos and videos through a branded upload page with EventUploader, then manage contributions before deciding what to share. Create your event, test a phone upload, and put the working QR code on your table cards before you print the full set.